1. Under the Mapping Products tab, select the purple button Add Parts.
2. Add parts by item SKU or by entering parts of the title. Hit the search bar to populate the results. Hit the little square box to check mark the items to add.

3. You are also able to erase and search for additional parts if you’d like to combine different parts for a certain set of vehicles eg. different wheels for a 05-14 Toyota Tacoma
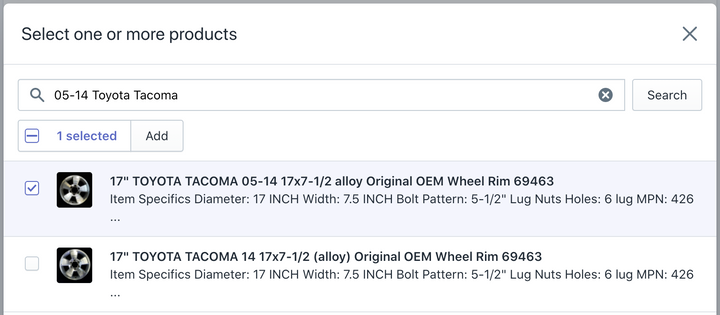
4. Hit the Add button on the bottom right corner to add the desired parts to the fitment profile.
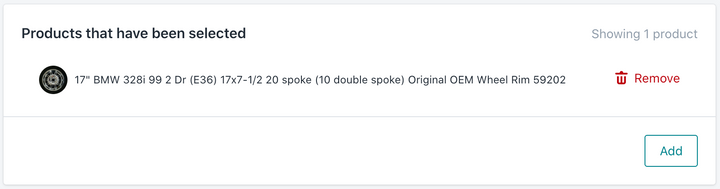
5. Hit Empty to delete all previously selected profiles so be careful to only choose this option if you plan to start from step 2.6. After the desired parts are added continue entering the correct fitment profile based on Vehicle Make, Model, and Year. Each section has a particular shortcut eg for Make you can search based off the first letter of the make
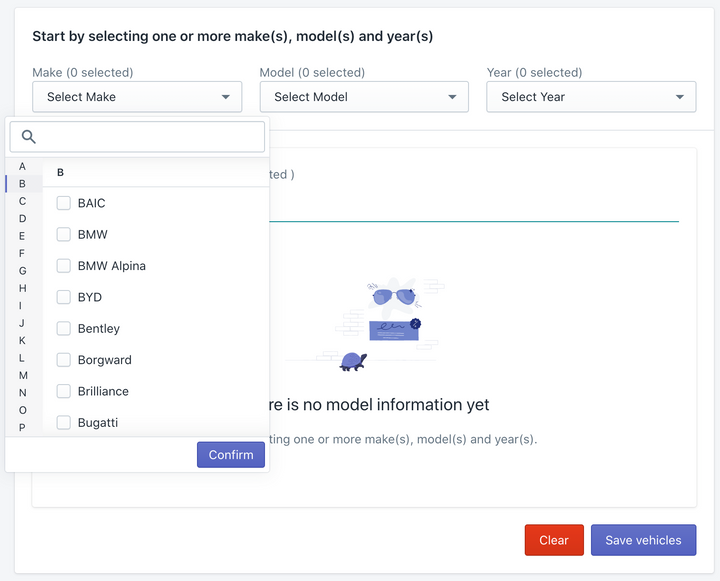
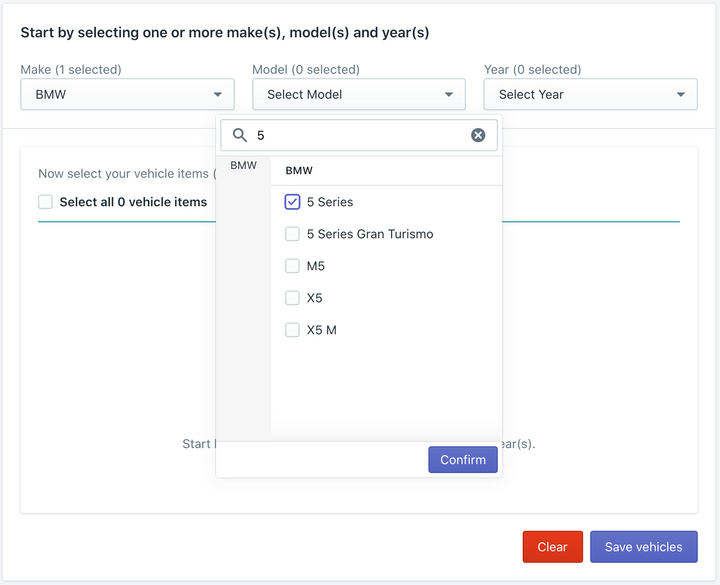
For model you can type the model and it will search as you go
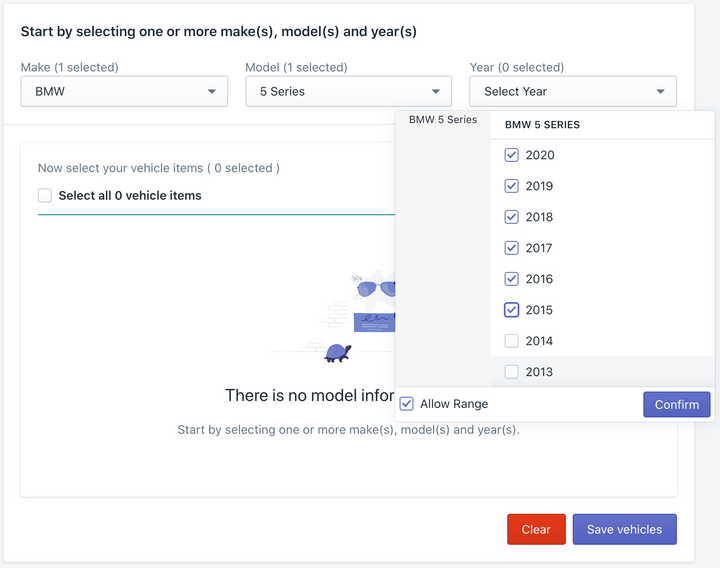
And for years you can select the beginning range to end range.
(this is optional; on the bottom left corner of the year box toggle checkmark whether or not to Allow Range).
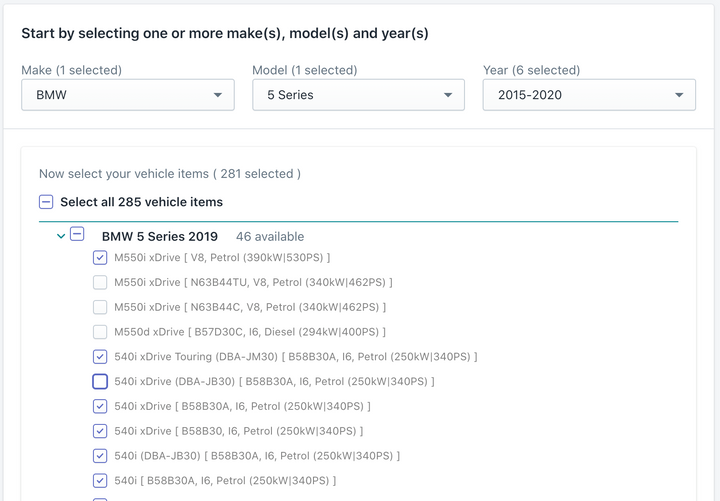
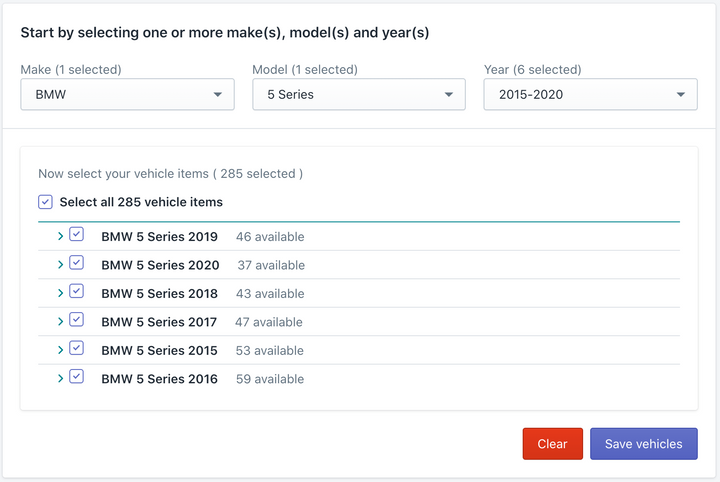
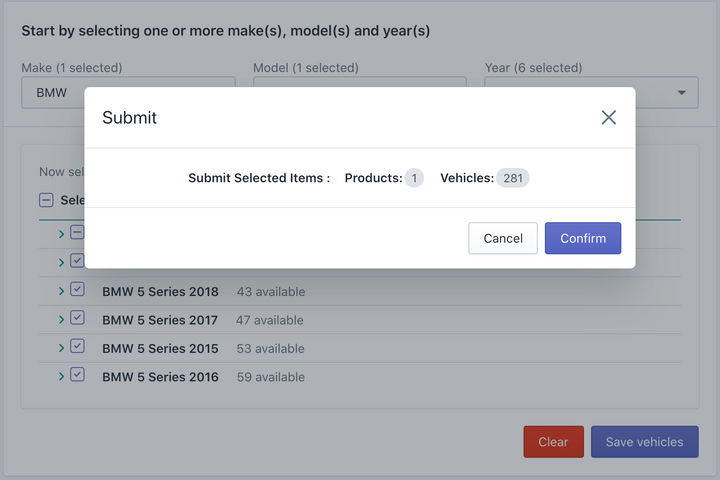
7. Finalize the selected fitment profiles after they have been selected and hit Save Vehicles.
8. Confirm the number of products to vehicles fitted on the final submit page. Hit Confirm.
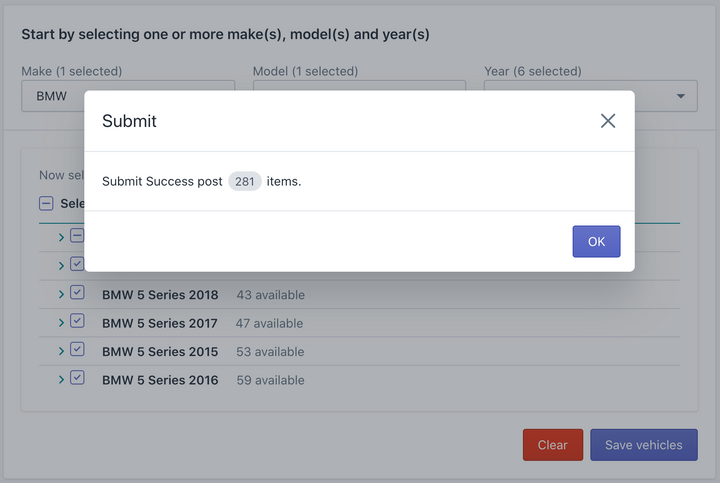
9. Successful add is followed by a success screen showing you total items added.
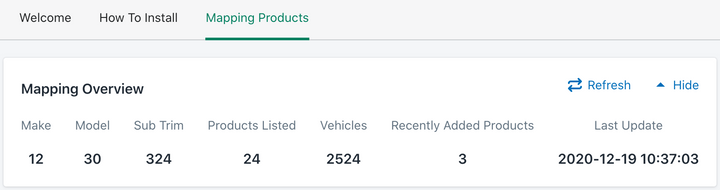
10. On the Mapping Overview screen refer to recently added parts based on date, time, and quantity.